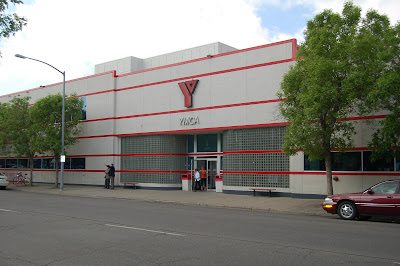
YMCA Healthy Halloween Party
No candy is handed out, only toys and prizes as "treats". Preschool age
children through 12 years of age are welcome! This is a free event!
When | Sat Oct 30 2pm – 5pm |
Where | Billings Family YMCA |


When | Sat Oct 30 2pm – 5pm |
Where | Billings Family YMCA |


7:00 - 8:00 PM, at Pictograph Cave State Park

Have some warm apple cider and seasonal treats around a campfire in the park's picnic area.
Dress for the weather and bring and bring a flashlight and lawn chair.
| Directions: | |
| Pictograph Cave National Historic Landmark is located 7 miles southeast of Billings off I-90 at the Lockwood exit, then 6 miles south on Coburn Road. | |

Date: Saturday and Sunday, October 30th & 31st
Time: 12-4pm
Admission Information:
Members entry at noon.
Non-Members entry at 1pm.
Zoo Opens at noon on both days.
Kids (Ages 3-15) receive free Admission when entering in costume.
Adults $6.25
Seniors $4.25
Dozens of businesses providing candy and samples to every kid.


Help your little one transform a paper lunch bag into a creepy Halloween monster.
From the Blog: Crafts by Amanda
Materials:
-Brown paper lunch bag
-Acrylic craft paint
-Paintbrush
-Construction paper
-Scissors
-Glue stick
-Black marker
-Spray glaze or acrylic sealer (optional)
Instructions:
1. Paint bags whatever color you like. Stand them up and let dry. (Place soup cans inside so they don't tip over.) Add another coat and let dry again.
2. While bags are drying, cut facial features out of construction paper. You can use your imagination to make some fun eyes, mouths, and hair.
3. Cut polka dots, squares, stripes, or any other type of decoration you would like to use for your monster.
4. Fold down the top of the bag so that you don't accidentally glue your facial features too high.
5. Using your glue stick, decorate the bag with the stripes, squares, or polka dots. Be sure to cover the entire back of paper shapes with glue so none of the corners stick up.
6. Let everything dry, then apply a coat of sealer spray (optional). Let dry and fill with treats.

These monogrammed baskets make smart use out of recycled ice cream containers.
From the Blog: Brown Paper Packages
Materials:
-Empty ice cream bucket with a handle
-Felt
-Hot-glue gun
-Ribbon, about 5-6 yards per bucket
-Scissors
-Foam stamps
-Craft paint
Instructions:
1. Using the hot-glue gun, apply the felt to the bucket, covering the entire outer surface. Trim where necessary.
2. Glue ribbon to the top and bottom of the bucket, covering up the felt edges and the top rim.
3. Tie ribbons along the handle.
4. Use paint to stamp desired name on the front.

Update a classic fabric tote with easy-to-make stencils and spooky sponge painting.
From the Blog: Alphamom, Designed by The Long Thread
Materials:
-Fabric tote
-Fabric paint
-Stencil brush or sponge
-Cereal box
-Crafts knife and cutting mat
-Masking tape
Instructions:
1. Cut one of the largest rectangles from your cereal box.
2. Cut out jack-o'-lantern shapes with a crafts knife on a cutting mat. (An adult will need to do this part.)
3. Next, tape your template to the fabric and have your kids dab on the paint using a stencil brush or sponge (you could also use the end of a spongy paint roller). The trick to getting the paint on neatly is to hold the brush or sponge end perpendicular to the surface. Let dry.
These smiley jack-o'-lanterns can store almost a gallon's worth of treats each!
From the Blog: Filth Wizardry
Materials:
-Plastic gallon milk jugs
-Orange acrylic paint
-Paintbrush
-Scissors
-Black paper
-White glue
-Green chenille stems
-Paper leaf cutouts
-Green tissue paper

Paint the ends of wood logs with primer, then apply two coats of paint. Be sure to saw off ends before burning.
Transform orange paper into foldable, freestanding decorations that you can reuse every fall.
What you'll need: Orange and green solid or patterned scrapbooking paper, scissors or circle cutter, glue
Make it: Cut out 6 equal circles or ovals from matching scrapbooking paper. Fold each in half (keep desired pattern or color on the inside), then glue one half circle on top of another. When all 6 are stacked, pull the top half circle around to meet the bottom half circle and glue together. Cut a stem shape from green paper; attach to top of pumpkin with glue.
Hang a pumpkin patch from the porch or ceiling. Glue cardstock facial features to paper lanterns (we found ours at pearlrivermart.com) and suspend using fishing line or painter's tape.
Hang a round orange wreath made from burlap and batting on your front door.
What You'll Need: 16" Styrofoam wreath form, cardboard, scissors, hot-glue gun, cotton batting, orange burlap, black adhesive-backed craft foam, green ribbon, fishing line
Make It: Cut a cardboard circle to cover the back of wreath form; attach with hot glue. Place on flat surface, cardboard side down, and fill center with cotton batting until top of mound sits about 2" higher than the wreath form. Cut 15 to 20 3"x20" strips of orange burlap for wreath covering. Glue on end of each strip to center of cardboard back, then stretch all the way around the wreath and secure other end with glue. Repeat for each strip, working in a circular motion until form is completely covered with burlap. Cut out facial features from craft foam and adhere to rounded side of wreath with hot glue. Loop a 20" piece of green ribbon through the top strip of the wreath and know consecutively to create the pumpkin's stem. Hang with fishing line.